CentOS配置Nginx+Lua+GraphicsMagick
一、安装环境及软件版本
CentOS Linux release 7.2.1511
LuaJIT-2.0.4.tar.gz
lua-5.3.3.tar.gz
GraphicsMagick-1.3.24.tar.gz
nginx-1.10.1.tar.gz
二、安装前准备
1、git工具(需要从GitHub获取源码)
yum -y install epel-release git
2、安装GCC编译器(源码安装软件时用来编译)
yum install -y gcc gcc-c++ zlib zlib-devel openssl openssl-devel pcre pcre-devel
3、安装依赖库
yum install -y libpng libjpeg libpng-devel libjpeg-devel ghostscript libtiff libtiff-devel freetype freetype-devel readline-devel ncurses-devel
三、下载相关软件
1、一般讲源码下载到/usr/local/src目录中
2、wget是一个下载文件的工具,用于在线下载源码包等
3、安装了git工具后,可以使用git命令从GitHub获取源码
其中nginx-http-concat和echo-nginx-module模块非必须
1 2 3 4 5 6 7 8 9 10 11 | cd /usr/local/srcwget http://nginx.org/download/nginx-1.10.1.tar.gzwget http://luajit.org/download/LuaJIT-2.0.4.tar.gzwget http://zlib.net/zlib-1.2.8.tar.gzwget http://www.lua.org/ftp/lua-5.3.3.tar.gz wget ftp://ftp.graphicsmagick.org/pub/GraphicsMagick/1.3/GraphicsMagick-1.3.24.tar.gz git clone https://github.com/alibaba/nginx-http-concat.gitgit clone https://github.com/simpl/ngx_devel_kit.gitgit clone https://github.com/openresty/echo-nginx-module.gitgit clone https://github.com/openresty/lua-nginx-module.git |
四、编译安装
1、LuaJIT(Lua即时编译器)
1、LuaJIT是Lua语言写的脚本的即时编译器(Just-In-Time Compilerfor)
2、与带有configure的源码包不一样,LuaJIT在make和make install的时候通过PREFIX来指定安装目录
3、export指定了环境变量,当前终端有效
4、64位系统是去 /lib64 目录中寻找动态库的,无法找到动态库 libluajit-5.1.so.2 ,解决办法就是使用ln将 /usr/local/lib/libluajit-5.1.so.2 软连接到 /lib64 目录下
1 2 3 4 5 | make PREFIX=/usr/local/LuaJIT-2.0.4make install PREFIX=/usr/local/LuaJIT-2.0.4export LUAJIT_LIB=/usr/local/LuaJIT-2.0.4/libexport LUAJIT_INC=/usr/local/LuaJIT-2.0.4/include/luajit-2.0ln -s /usr/local/LuaJIT-2.0.4/lib/libluajit-5.1.so.2 /lib64/libluajit-5.1.so.2 |
2、Lua(一个小巧的脚本语言)
1、Lua编译 make+平台名称,我这里是linux
2、与带有configure的源码包不一样,Lua在安装的时候通过INSTALL_TOP指定安装目录
1 2 | make linuxmake install INSTALL_TOP=/usr/local/lua-5.3.3 |
3、GraphicsMagick(图像处理领域的瑞士军刀)
1、源码包带有configure,可以配置参数
2、graphicsmagick在64位下 默认编译方式在高并发下 很耗CPU资源 主要是因为用了openmp多线程的原因所以编译的时候取消openmp支持(./configure --disable-openmp)
1 2 3 | ./configure --prefix=/usr/local/GraphicsMagick --enable-sharedmakemake install |
4、Nginx
1、编译Nginx之前先配置好用户和用户组以便于权限管理(一般来说,程序不具有管理员权限,某些不具有写入权限等)
2、groupadd developer——添加一个名为developer的用户组,以后所有的程序开发都使用这个
3、useradd -g developer nginx -s /bin/false,将用户nginx添加到developer组中,/bin/false禁用nginx登录电脑(一般来说程序使用的账户不必登录电脑,毕竟管理员有专门的账号)
groupadd developer
useradd -g developer nginx -s /bin/false
1、将用户和用户组配置到nginx的configure选项中,如下标红处
2、groupadd developer——添加一个名为developer的用户组,以后所有的程序开发都使用这个
3、useradd -g developer nginx -s /bin/false,将用户nginx添加到developer组中,/bin/false禁用nginx登录电脑(一般来说程序使用的账户不必登录电脑,毕竟管理员有专门的账号)
4、nginx要与lua模块关联起来
1 2 3 4 5 6 7 8 9 10 11 12 13 14 15 16 17 18 19 20 21 22 | ./configure --prefix=/usr/local/nginx \--user=nginx \--group=developer \--with-http_ssl_module \--with-http_realip_module \--with-http_sub_module \--with-http_flv_module \--with-http_dav_module \--with-http_gzip_static_module \--with-http_stub_status_module \--with-http_addition_module \--with-http_v2_module \--with-pcre \--with-zlib=../zlib-1.2.8 \--add-module=../nginx-http-concat \--add-module=../lua-nginx-module \--add-module=../ngx_devel_kit \--add-module=../echo-nginx-module \--with-ld-opt=-Wl,-rpath,$LUAJIT_LIB makemake install |
到这里,LuaJIT+Lua+GraphicsMagick+Nginx就安装完毕了
五、Nginx配置文件
1、root指定当前server的根目录,对应系统上的具体文件夹
2、安装并启动nginx后,使用lua1来验证nginx是否启动成功并支持lua脚本(浏览器输入http://192.168.1.111/lua1,可以输出“你好!!Lua”即启动成功)
3、粉红色对应的正则表达式用于拦截图片请求(图片请求都是以固定格式请求的,所以用正则匹配)
4、深红色部分是设置ngx变量,变量值就是正则匹配的$匹配组的值,设置好变量后可以在lua脚本中使用

server {
        listen       80;
        server_name  192.168.1.111;
        root /resource/image;

        location /lua1 {
           default_type 'text/plain';
           content_by_lua 'ngx.say("你好!!Lua")';
        }


            location ~* ^(.+\.(jpg|jpeg|gif|png))_(\d+)x(\d+)\.(jpg|jpeg|gif|png)$ {
                root /resource/image;
                if (!-f $request_filename) {    # 如果文件不存在时才需要裁剪
                        add_header X-Powered-By 'Lua GraphicsMagick';    # 此 HTTP Header 无实际意义,用于测试
                        add_header file-path $request_filename;    # 此 HTTP Header 无实际意义,用于测试
                        #lua_code_cache off; # 在编写外部 Lua 脚本时,设置为 off Nginx 不会缓存 Lua,方便调试
                        set $request_filepath /resource/image$1;    # 设置原始图片路径,如:/document_root/1.gif
                        set $width $3;    # 设置裁剪/缩放的宽度
                        set $height $4;    # 设置裁剪/缩放的高度
                        set $ext $5;    # 图片文件格式后缀
                        content_by_lua_file lua/ImageResizer.lua;    # 加载外部 Lua 文件
                }
            }
}
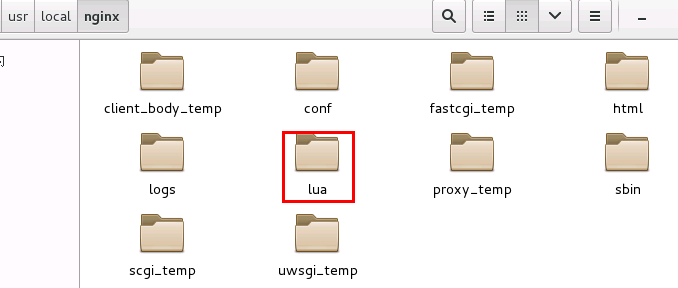
浅绿色部分指定了处理图像的具体lua脚本文件,lua/ImageResizer.lua表示在nginx安装目录下有个lua目录
ImageResizer.lua文件内容如下
local command = "/usr/local/GraphicsMagick/bin/gm convert   -auto-orient -strip " .. ngx.var.request_filepath .. " -resize " .. ngx.var.width .. "x" .. ngx.var.height .. " +profile \"*\" " .. ngx.var.request_filepath .. "_" .. ngx.var.width .. "x" .. ngx.var.height .. "." .. ngx.var.ext;
os.execute(command);
ngx.exec(ngx.var.request_uri);
六、测试效果
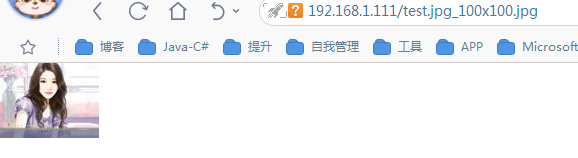
在上述根目录/resource/image目录中放名为test.jpg的图片文件,如下:

浏览器http://192.168.1.111/test.jpg_100x100.jpg,结果如下:
注意,如果出现访问禁止,尝试看下/resource/image目录的用户和用户组是否正确